Get Started
This guide uses the OpenAI Python client to make requests to LiteLLM Proxy. This will work across all languages as LiteLLM Proxy is OpenAI compatible.
This guide demonstrates how to use LiteLLM Proxy with Langfuse
- Use LiteLLM Proxy for calling 100+ LLMs in OpenAI format
- Use Langfuse for LLM Observability, Evals, and Prompt Management
In this guide we will setup LiteLLM Proxy to make requests to OpenAI, Anthropic, Bedrock and automatically log traces to Langfuse.
Read the overview page to learn more about the stack.
Setup
Setup Langfuse
Deploy Langfuse (docker compose, helm on k8s) or create a free account on Langfuse Cloud.
Create a new project to obtain credentials during setup.
Setup LiteLLM Proxy
Define .env variables on the container that litellm proxy is running on. This example uses OpenAI, Anthropic, Bedrock and Langfuse to illustrate the integration. You can use any of the models supported by LiteLLM Proxy.
## LLM API Keys
OPENAI_API_KEY=sk-proj-1234567890
ANTHROPIC_API_KEY=sk-ant-api03-1234567890
AWS_ACCESS_KEY_ID=1234567890
AWS_SECRET_ACCESS_KEY=1234567890

# LiteLLM Master Key
LITELLM_MASTER_KEY=sk-master-1234567890

## Langfuse Logging
LANGFUSE_PUBLIC_KEY="pk-lf-xxxx9"
LANGFUSE_SECRET_KEY="sk-lf-xxxx9"
LANGFUSE_HOST="https://us.cloud.langfuse.com"
Setup LiteLLM Proxy Config
See docs for more details on the config file.
# Configure models to use
model_list:
  - model_name: gpt-4o
    litellm_params:
      model: openai/gpt-4o
      api_key: os.environ/OPENAI_API_KEY
  - model_name: claude-3-5-sonnet-20241022
    litellm_params:
      model: anthropic/claude-3-5-sonnet-20241022
      api_key: os.environ/ANTHROPIC_API_KEY
  - model_name: us.amazon.nova-micro-v1:0
    litellm_params:
      model: bedrock/us.amazon.nova-micro-v1:0
      aws_access_key_id: os.environ/AWS_ACCESS_KEY_ID
      aws_secret_access_key: os.environ/AWS_SECRET_ACCESS_KEY

# Enabled Langfuse logging
litellm_settings:
  callbacks: ["langfuse"]
Simple End-to-End Example
Make LLM Requests to LiteLLM Proxy
Use any OpenAI compatible client to make requests to LiteLLM Proxy. Authenticate using the master key or a LiteLLM Virtual Key.
When switching between models, you only need to change the model parameter.
# Setup LiteLLM Proxy Base URL
LITELLM_PROXY_BASE_URL="http://0.0.0.0:4000"

# Use the master key for authentication, can be replaced with a virtual key
LITELLM_VIRTUAL_KEY="sk-master-1234567890"

# Use regular OpenAI client
import openai
client = openai.OpenAI(
    api_key=LITELLM_VIRTUAL_KEY,
    base_url=LITELLM_PROXY_BASE_URL
)

response = client.chat.completions.create(
    model="gpt-4o",
    messages = [
        {
            "role": "user",
            "content": "what is Langfuse?"
        }
    ],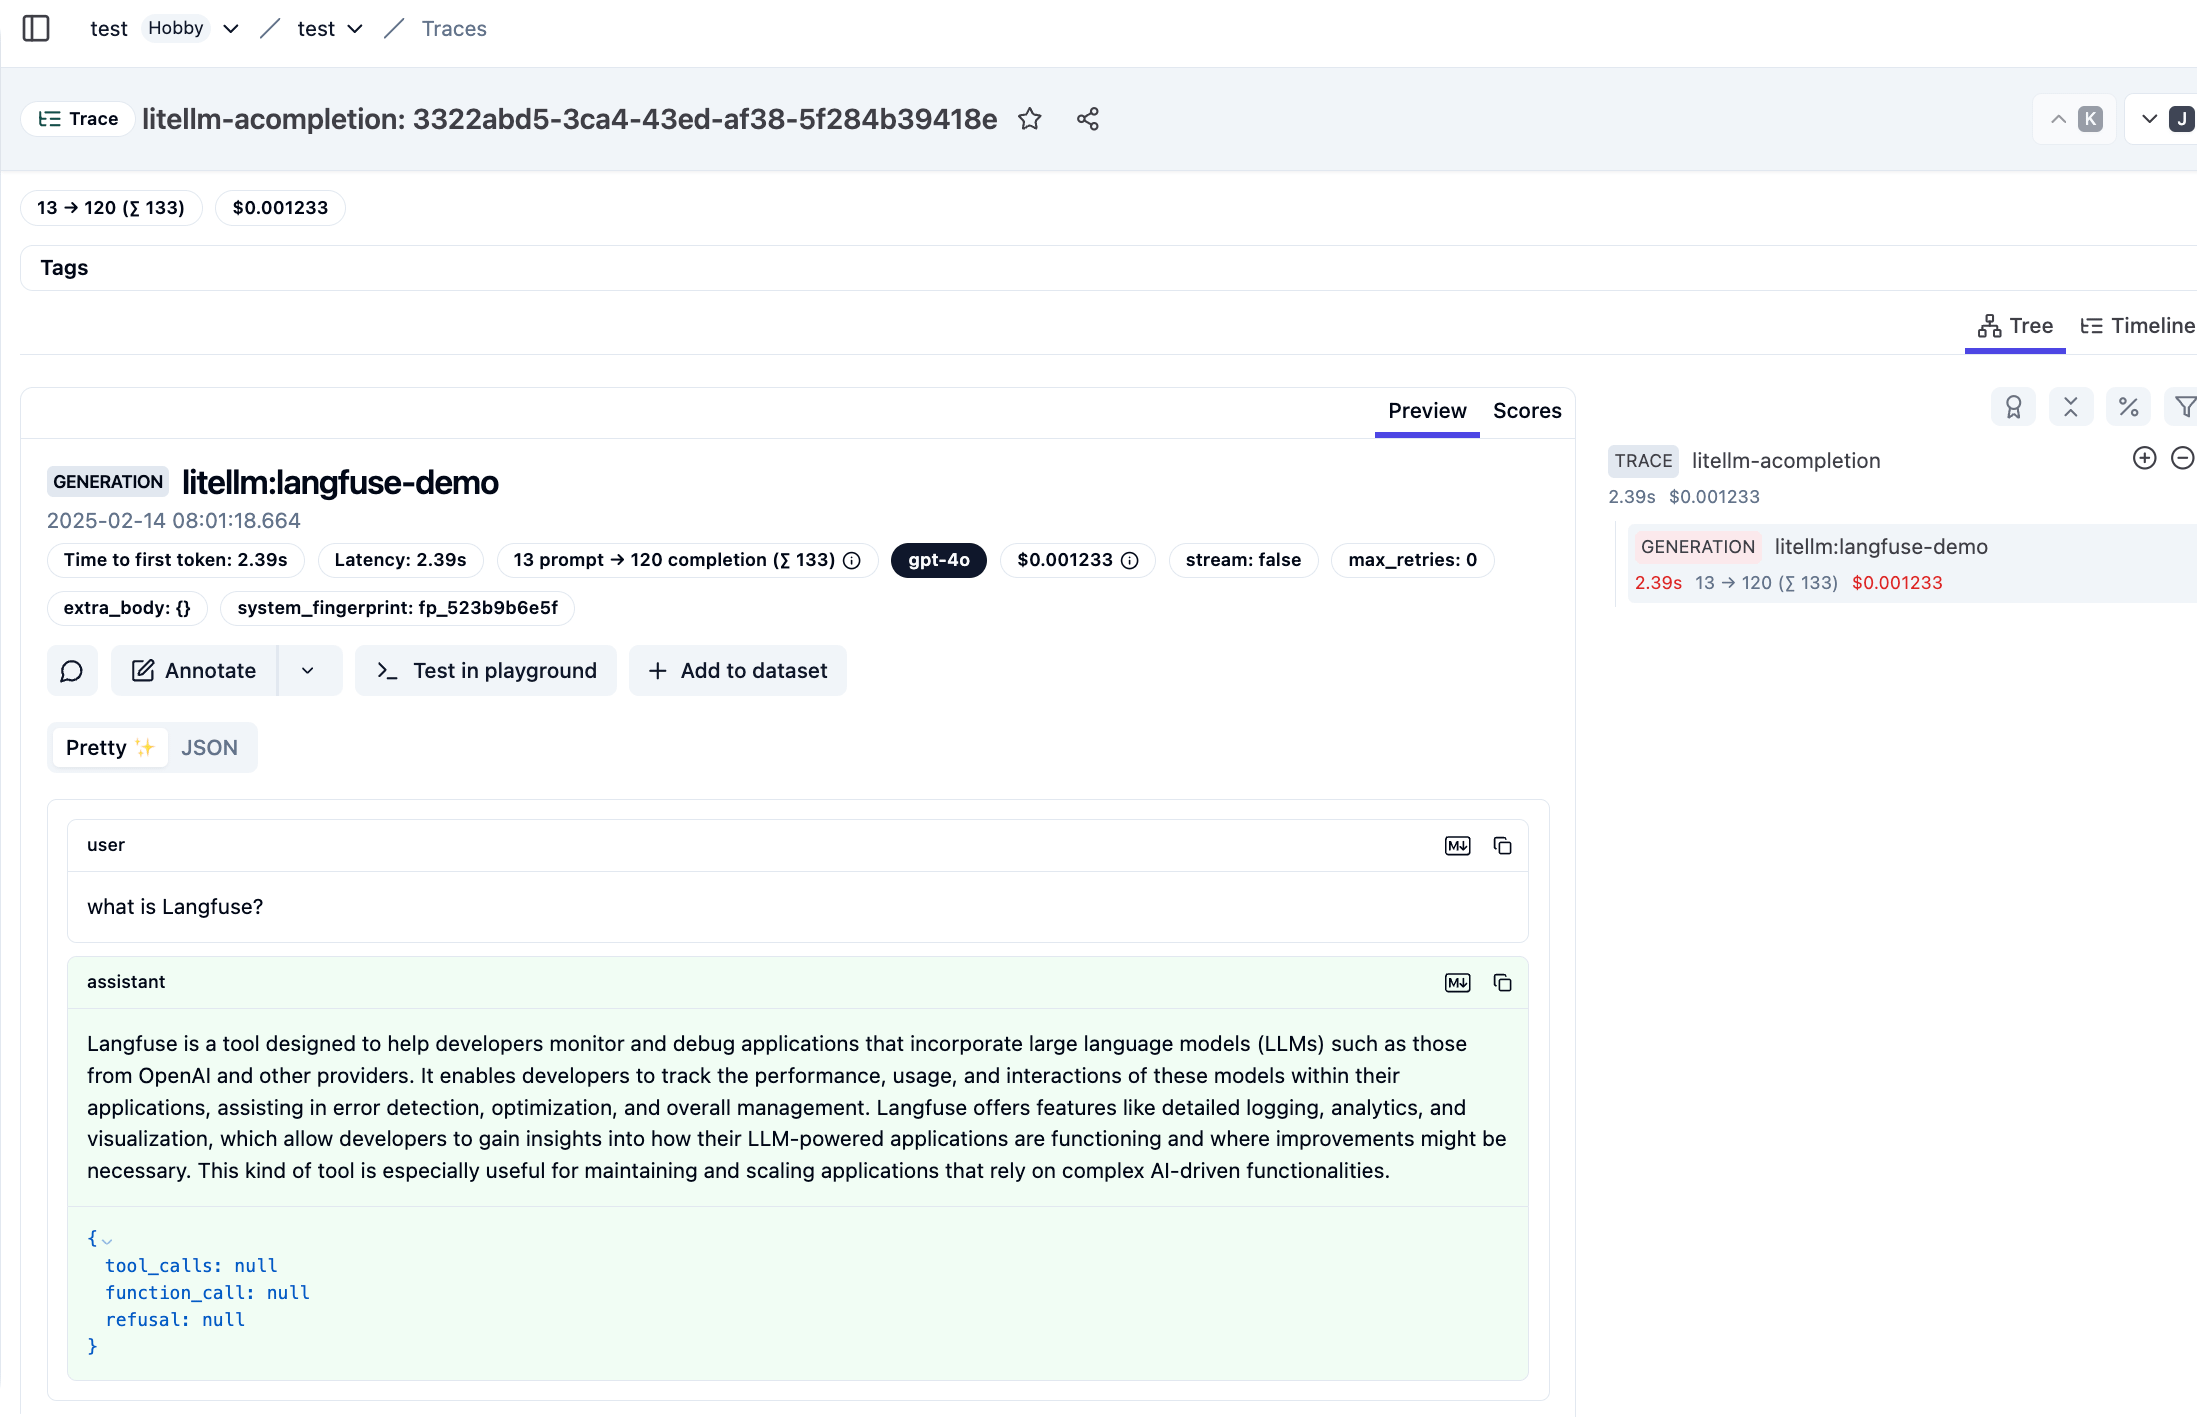
)See resulting traces in Langfuse
LiteLLM will send the request / response, model, tokens (input + output), cost to Langfuse.
In the Langfuse UI you will see traces like the following:
Pass additional Langfuse parameters
Langfuse Tracing offers many customization options to accurately capture the nature of your application.
LiteLLM Proxy supports passing additional Langfuse parameters to the client side request. See full list of supported langfuse params here.
import openai
client = openai.OpenAI(
    api_key=LITELLM_VIRTUAL_KEY,
    base_url=LITELLM_PROXY_BASE_URL
)

response = client.chat.completions.create(
    model="us.amazon.nova-micro-v1:0",
    messages = [
        {
            "role": "user",
            "content": "what is Langfuse?"
        }
    ],
    # Pass additional Langfuse parameters in the extra_body
    extra_body={
        "metadata": {
            "generation_id": "1234567890",
            "trace_id": "567890",
            "trace_user_id": "user_1234567890",
            "tags": ["tag1", "tag2"]
        }
    }
)
Learn more
This is it for a simple end-to-end example. You can explore all of LiteLLM and Langfuse features in their respective documentation.
LiteLLM (GitHub)
- Unified LLM API
- Failover & Load Balancing
- Logging & Request Tracking
- Model Access Controls
- Budgets & Rate Limits
- Integration with Prompt Management
Langfuse (GitHub)